知识点名称:RelativeLayout布局
编号: K2-2
前驱知识点编号:K1-3
作者:
讲义内容:
RelativeLayout 又称作相对布局,也是一种非常常用的布局。和 LinearLayout 的排列规则不同,RelativeLayout 显得更加随意一些,它可以通过相对定位的方式让控件出现在布局 的任何位置。也正因为如此,RelativeLayout 中的属性非常多,不过这些属性都是有规律可 循的,其实并不难理解和记忆。
相对于父布局定位
android:layout_alignParentLeft 父布局的左边
android:layout_alignParentTop 父布局的顶边
android:layout_alignParentRight 父布局的右边
android:layout_alignParentBottom 父布局的底边
android:layout_centerInParent 父布局的中间
相对于控件button3进行定位,例如:
android:layout_above="@id/button3"
android:layout_toLeftOf="@id/button3"
1.相对于父布局
<RelativeLayout xmlns:android="http://schemas.android.com/apk/res/android" android:layout_width="match_parent"         android:layout_height="match_parent" >
    <Button
        android:id="@+id/button1"
        android:layout_width="wrap_content"
        android:layout_height="wrap_content"
        android:layout_alignParentLeft="true"
        android:layout_alignParentTop="true"
        android:text="Button 1" />
    <Button
        android:id="@+id/button2"
        android:layout_width="wrap_content"
        android:layout_height="wrap_content"
        android:layout_alignParentRight="true"
        android:layout_alignParentTop="true"
        android:text="Button 2" />
    <Button
        android:id="@+id/button3"
        android:layout_width="wrap_content"
        android:layout_height="wrap_content"
        android:layout_centerInParent="true"
        android:text="Button 3" />
    <Button
        android:id="@+id/button4"
        android:layout_width="wrap_content"
        android:layout_height="wrap_content"
        android:layout_alignParentBottom="true"
        android:layout_alignParentLeft="true"
        android:text="Button 4" />
    <Button
        android:id="@+id/button5"
        android:layout_width="wrap_content"
        android:layout_height="wrap_content"
        android:layout_alignParentBottom="true"
        android:layout_alignParentRight="true"
        android:text="Button 5" />
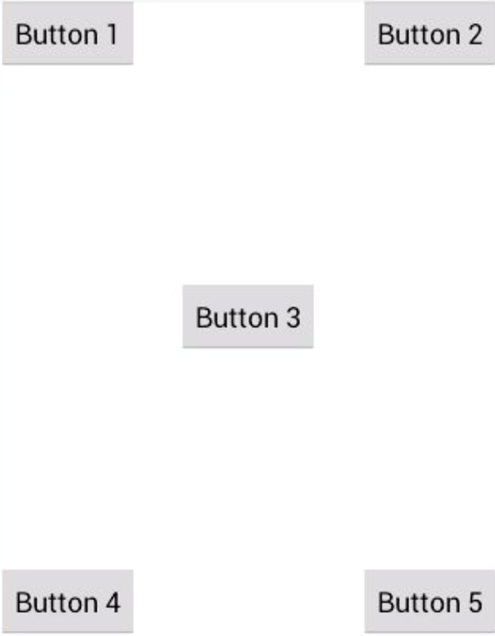
我们让 Button 1 和父布局的左上角对齐,Button 2 和父布局的右上角对齐,Button 3 居中显示,Button 4 和父 布局的左下角对齐,Button 5 和父布局的右下角对齐。运行程序,效果如图:
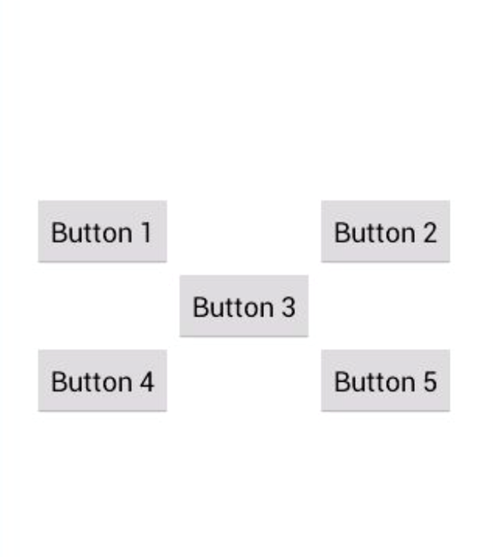
2.相对于控件进行布局
<RelativeLayout xmlns:android="http://schemas.android.com/apk/res/android" android:layout_width="match_parent" android:layout_height="match_parent" >
    <Button
        android:id="@+id/button3"
        android:layout_width="wrap_content"
        android:layout_height="wrap_content"
        android:layout_centerInParent="true"
        android:text="Button 3" />
    <Button
        android:id="@+id/button1"
        android:layout_width="wrap_content"
        android:layout_height="wrap_content"
        android:layout_above="@id/button3"
        android:layout_toLeftOf="@id/button3"
        android:text="Button 1" />
    <Button
        android:id="@+id/button2"
        android:layout_width="wrap_content"
        android:layout_height="wrap_content"
        android:layout_above="@id/button3"
        android:layout_toRightOf="@id/button3"
        android:text="Button 2" />
    <Button
        android:id="@+id/button4"
        android:layout_width="wrap_content"
        android:layout_height="wrap_content"
        android:layout_below="@id/button3"
        android:layout_toLeftOf="@id/button3"
        android:text="Button 4" />
    <Button
        android:id="@+id/button5"
        android:layout_width="wrap_content"
        android:layout_height="wrap_content"
        android:layout_below="@id/button3"
        android:layout_toRightOf="@id/button3"
        android:text="Button 5" />
</RelativeLayout>
android:layout_above 属性可以让 一个控件位于另一个控件的上方,需要为这个属性指定相对控件 id 的引用,这里我们填入 了@id/button3,表示让该控件位于 Button 3 的上方。其他的属性也都是相似的,android:layout_below 表示让一个控件位于另一个控件的下方,android:layout_toLeftOf 表示让 一个控件位于另一个控件的左侧,android:layout_toRightOf 表示让一个控件位于另一个控件 的右侧。注意,当一个控件去引用另一个控件的 id 时,该控件一定要定义在引用控件的后 面,不然会出现找不到 id 的情况。效果如下图: